T5 WORKS IN PROGRESS: fabrication of the pedestal
- May 12
- 2 min read
Updated: Jun 5

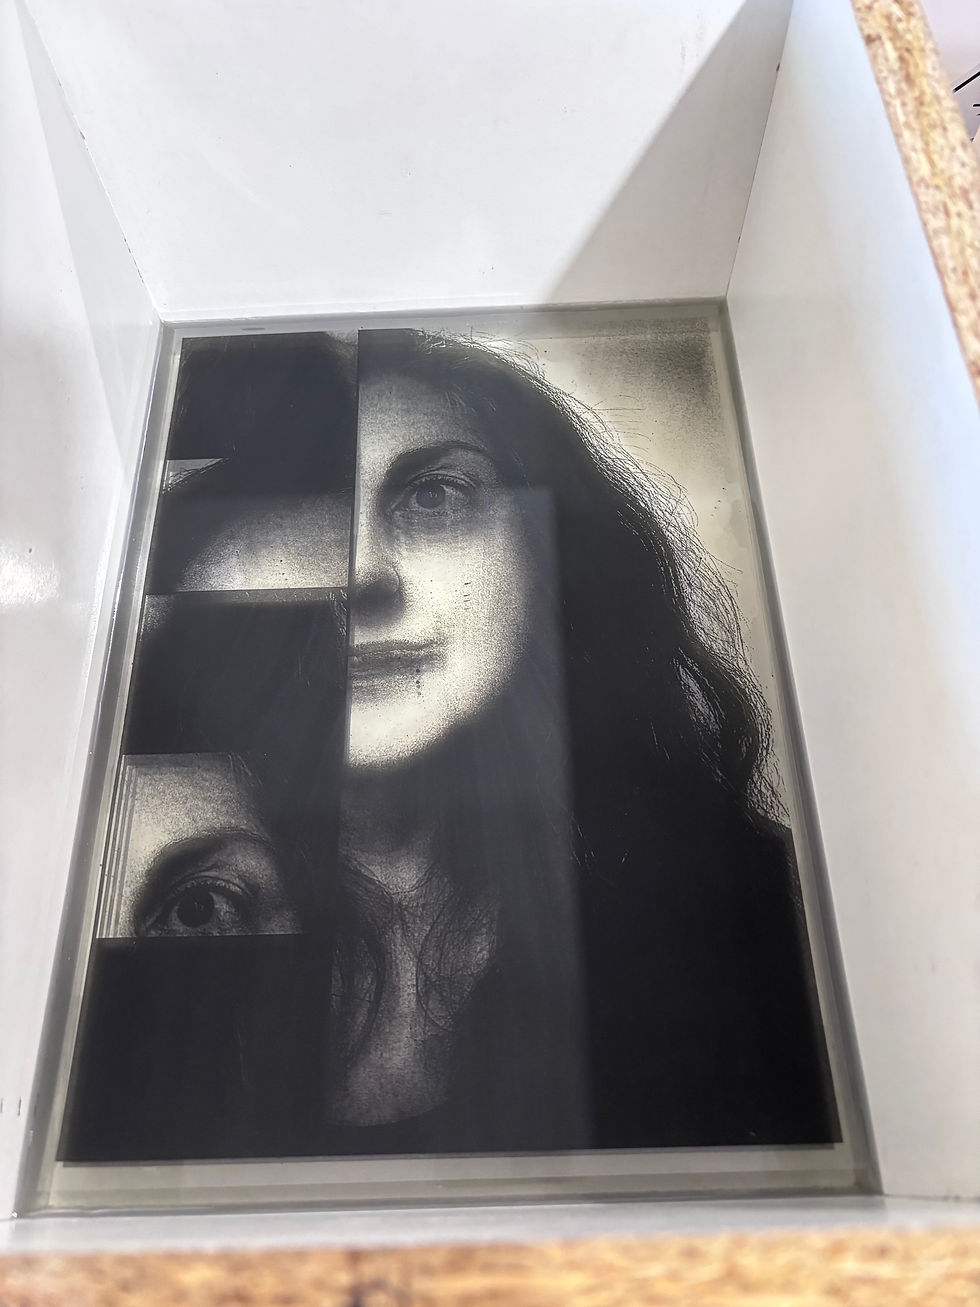
This week, with the help of Scott, I began and finalised the concrete pedestal for Life in Pieces. The process started with preparing and collecting materials before the casting day. At the beginning of the week, I collected foam from school and from Indy’s TV boxes, which was used as part of the internal structure and form-making process.
6 May -
Scott purchased the remaining materials, including melamine for the pedestal mould, chicken wire for reinforcement, seven 20kg bags of concrete, and 1kg of black oxide.
7 May -
Scott builds the mould for the concrete pedestal using melamine seconds from Bunnings, which only cost $4. This was a practical and cost-effective solution that allowed us to create the form without exceeding the project budget.


Figures 2-7. Studio process shot of concrete pedestal before the concrete, 2026, cement, melamine, foam, chicken wire, photographs by artist.
9 May -
Scott mixes and casts the concrete pedestal. During the mixing process, 1kg of black oxide was added and worked through the concrete to darken the surface and give the pedestal a stronger visual weight. I wanted the concrete to be darker because black pretty much represents me. This made the material feel more personally connected to me, rather than functioning only as a neutral support structure.
This was one of the most physically demanding parts of the project, particularly because of the weight of the concrete and the scale of the form. Having Scott's help was essential, as this process would not have been physically possible for me to complete alone.


Figures 8-22. Studio process shot of the concrete pour for the pedestal, 2026, concrete, black oxide, water, melamine, foam, chicken wire, photographs by artist.
10 May -
We removed the mould to reveal the concrete pedestal. The form was left to dry and cure fully, allowing at least a week for the concrete to strengthen.


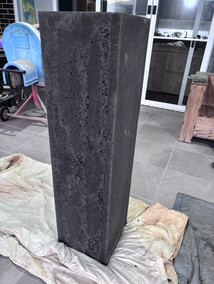


Figures 23-33. Studio process shot of the removal of the mould for concrete pedestal, 2026, concrete, black oxide, water, melamine, foam, chicken wire, photographs by artist
12 May -
Scott used a concrete sander attachment on the grinder to cut back and polish the rear of the pedestal where the slurry had settled during casting. This process helped refine the surface and remove excess material, making the back of the pedestal cleaner and more resolved. Although this area would not be the main viewing side, it was important to finish it properly, so the object felt complete from all angles.